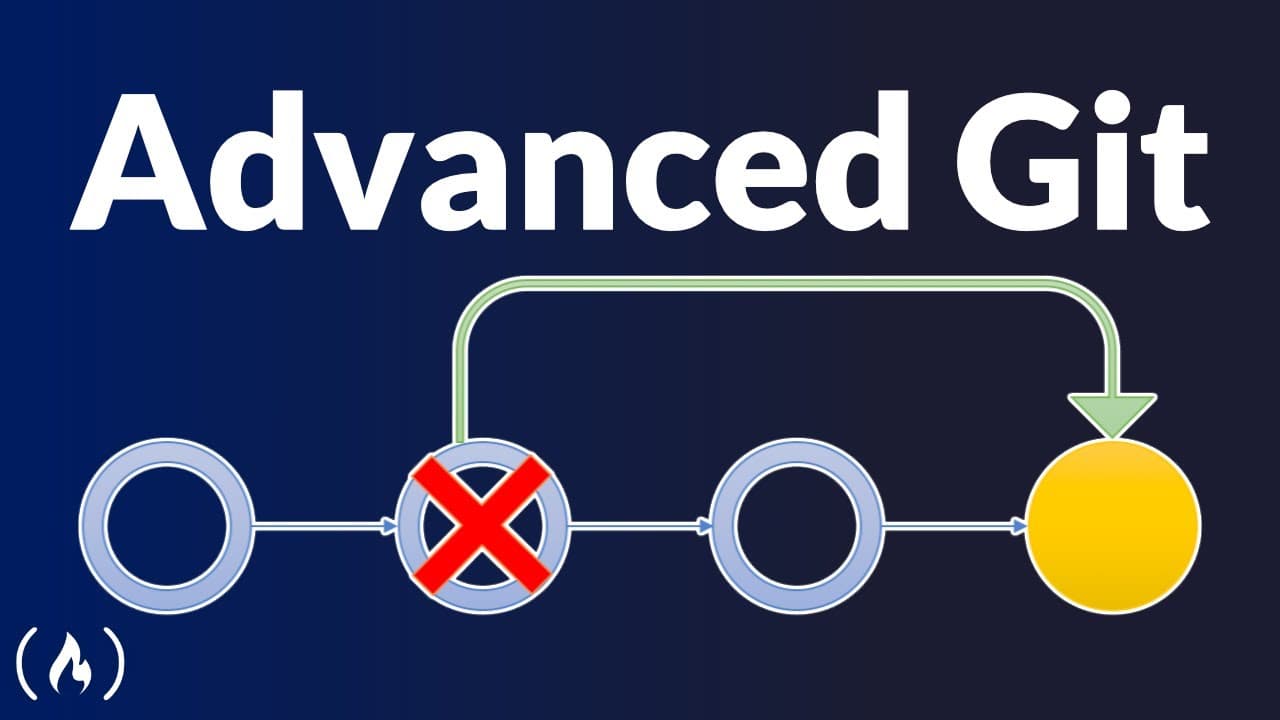
Advanced Git Tutorial - Interactive Rebase, Cherry-Picking, Reflog, Submodules and more
By freeCodeCamp.org
Summary
Interactive rebase lets you reorder, delete, reword, or squash commits in your local history. Use `reword` to change an older commit message and `squash` to combine multiple commits into one. Never rewrite history that has already been pushed to a shared repository. Cherry-picking applies a specific commit from one branch onto another. It is designed for special cases like moving a commit made on the wrong branch, not as a daily alternative to merge or rebase. The reflog records every HEAD movement, acting as Git's diary. It can restore seemingly lost commits after a hard reset by copying the commit hash from before the reset, and also recover deleted branches by returning to the state before deletion and creating a new branch. Git submodules let you include a separate repository as a nested folder. The parent repo only stores the submodule's URL, local path, and a pinned commit (not the actual contents). When cloning, submodule folders are empty; run `git submodule update --init --recursive` or clone with `--recurse-submodules` to populate them. Revision pinning ensures a fixed version of external code. Use `git log` with flags like `--after`, `--before`, `--grep`, `--author`, and `--` to filter commits by date, message, author, or file. The double-dot notation (`..`) shows commits in one branch that are not in another, helping you compare branches. The Advanced Git Kit is a free collection of short videos covering submodules, interactive rebase, cherry-picking, merge conflicts, and more to help you become more productive with Git.
Highlights
- Interactive Rebase Overview
- Cherry-pick is not a replacement
- Reflog git's diary of HEAD movements
- Submodules store only config in parent repo
- Cloning submodules requires update --init
Transcript
This is an advanced git course taught by Tobias Gunther. He'll teach you some more advanced
concepts and tools to make you more productive and confident with Git. Hello Free Code Camp
friends. My name is Tobias. And I'm going to make you a better get user today. If you're using Git
is your version control system, you have a lot of powerful stuff available. And we're going to talk
about some of the more advanced topics today, cherry picking, interactive rebase sub modules,
and much more. At the end of the session, you'll be a lot closer to becoming an advanced git user.
Before we start a huge shout out to the Free Code Camp team, thank you so much for being on
this mission of teaching people how to code and thanks for letting me contribute a little bit.
A couple of words about my own background, I am part of the team behind tower tower is a
get desktop GUI for Mac and Windows, we've been around for more than 10 years and helped over
100,000 developers and designer, designers work more easily with get become more productive with
Git and make fewer mistakes. For today's sessions session, you do not need to have tower installed,
you can follow along on the command line, don't worry. Okay, let's get started.
Interactive rebase is like the Swiss Army knife of good commands, lots of use cases
and lots of possibilities. It's really a great addition to any developers tool chain.
I'll start to explain what you can do with it. And then we'll look at a couple of practical
examples. So in short, interactive rebase allows you to manipulate your commit history, you can
make changes to your commits after the fact. So you could change an old commits message, you can
delete commits, reorder them, combine multiple commits, and even reopen a commit, edit it and
make new changes from its change that crazy stuff. Keep in mind, though, that interactive rebase
rewrites your commit history. So the commits you manipulate will have new hash IDs. Technically,
they are new commits. And there's a simple rule, you shouldn't use interactive rebase on stuff
that you've already pushed to a shared repository. Use it for cleaning up your local commit history.
A good example is when you're done developing on a feature branch,
before you merge it back into a team branch, you can optimize that clean up the commit structure,
so it's easier to understand. And that's exactly what interactive rebase is meant to do.
Before we take interactive rebase for a test drive, let's look at the general workflow.
This is the same no matter what exactly we're doing deleting a commit changing a commit message
combining commits, the general steps are always the same. So the first step is to determine which
range of commits you want to manipulate. How far back in time do you want to go?
Once you have that, you can start the actual interactive rebase session. And finally, you'll
have the change chance to make your edits. You can manipulate the selected commits by reordering
deleting, combining and so on. Okay, let's try this in practice. We'll do two things as examples.
First, we'll change an old commits message. And secondly, we'll combine two old commits into one.
Alright, let's hop into the command line and take a look at our repository. git log.
Okay, so let's say we want to change this commits message here, right.
Just to note, as a reminder, if it were the most recent commit, we want to change this one here,
we could just use git commit amend to change the commit message. But for anything older than that,
for this one, this one, this one, we really need to use interactive rebase. So the first step for
interactive rebase, determine our base commit termen, how far back in history we need to go.
And this is at least the parent commit of the one we want to manipulate. So we said we want to
change this here. So at least this one here. I could simply copy the commit hash of that commit,
or I can do a little bit of counting. So this is head currently head minus one head minus
two head minus three, I'll use that. So Git rebase. Stash interactive had till the three.
So there is an editor window popping up just as I promised. Let's make this bigger
And you can see all of the commits that we just selected. And by selected,
I mean that we referred to a range of commits, had to leave three, three behind the head,
from head all the way to the one we mentioned. So we can now manipulate these commits. But
big but, but we don't change the commit message right here. In this window, we only tell git,
what kind of manipulation we want to perform. So we just mark up this line here.
With the reward action keyword, that's the action keyword that allows us to change the
commit message. And don't worry, all of the action keywords or protocols are documented here in the
comments. Alright, reword, then we just save and close the window, we do not make our changes to
the commit message right here, right? We do not do that we only mark it up. So save and close.
And that's actually it. So now we get an editor window. Again, why is that
because we can now finally actually change the commit message. So let's make a change optimize
the markup structure, very important. Save and Close. And let's check git log again. And we can
see it's now optimized the markup structure. So we've successfully changed an old commits message.
So let's do one more example of an interactive rebase. Let's combine. Let's take a closer look.
Let's combine well, let's say these two, these two commits here into one. Again,
first step of any interactive rebase. Correct, we have to determine the base commit. And again,
we have to go at least to the parent commit, so at least this one here,
so it's head on is 1234. Okay, so the git rebase, interactive head, and tail D for
again, here are the commits, we just requested for manipulation. And this time we're using the
squash keyword. Squash works by combining the line we mark up this here with the one above.
So by marking up line number two, with squash good, we'll combine it with line number one,
which is what we want, right, we want to combine these two commits, so markup, this one with with
squash and combine it with the one before. Again, we just save and close the window.
And a new window will pop up, right. Why is that because by combining two old commits,
we are creating a new one, right. And we can give this new commit a commit message,
of course, so I'll just write combine two into one. And again, save and close.
And let's see what happened here on the command line.
All right, now we have combined these two old commits, you can see
they were present here, and they are now combined as one under this commit here.
So these were just two examples of what interactive rebase can do. If you want to
see the other possibilities, you should check out our video about undoing mistakes in Git, and I'll
add a link in the description. Normally, when you integrate commits, you do this on a branch level,
you use a command like Git merge or git rebase and integrate all the new commits
from one branch into your current head branch. And normally, that's exactly what you want.
But in some situations, you might only want a specific commit not all the commits from another
branch. And this is where it gets cherry picking tool comes in handy. I'll show you a practical
example in a minute. But before that a word of warning. Don't get too excited about cherry pick.
Your main way of integration should still be on the branch level, merge and rebase were built
exactly for this job. Cherry Picking should only be used for very special situations,
you need to have a good reason to use it. It's not a replacement for merge and rebase
a sure I'll show you a great example for when cherry pick is actually the right tool to use.
Let's say you made a commit on the wrong branch. As an example many teams don't want
you to commit directly The domain or master or other long running branches, and still we forget
and commit there by accident, of course. And this is a perfect example for cherry pick.
Let's take a look at an example situation in practice. Okay, so currently we are on master
and have that checked out. And the last commits is newsletter signup page. Okay, but we already
have a feature newsletter branch. So my guess is, and I'm correct. This should have been here,
this should have happened on the feature newsletter branch. So we want this commit here
to be on the feature branch and not on master. So let's use cherry pick to move it over. Oh, okay.
So first, we switch to the feature branch, feature newsletter in that case. And then we cherry pick
that commit over and we can just copy the commit hash. So this is the one we want to the clipboard.
And then git cherry, pick and hash of the commit. And Wallah, let's take a look at what happened.
And we can see, boom, here it is. Now, it should have been here in the first place. And finally,
here it is. If you also want to clean up the master branch, so this doesn't
linger here, it shouldn't be here. Then you can also do this week and get checkout
back to master and then get reset to Ashutosh hard head till the one head till the one means
one behind the head. So we're effectively deleting this from the master branch. And
Wallah. Master is clean and newsletter, feature newsletter now has that brand that commit sorry,
well as if nothing had happened. Let's talk a bit about a very special git tool,
the ref lock. You can think of the ref log as gits diary. It's a journal where git logs
every movement of the head pointer. So what is the movement of the head pointer Exactly. That's when
you commit checkout, merge rebase, cherry pick reset, all of the more interesting actions are
documented there. And this makes it perfect for those situations where things go wrong. Let me
show you a perfect use case for the ref log. Let's say we don't want these two newest commits here.
At least we think we don't want them anymore. And to get rid of those, we'll perform a reset,
right? They've disappeared from the commit history. And a while later,
we noticed that this was a horrible mistake. We've just lost valuable commits.
So let's have some fun and make this horrible mistake in practice.
Alright, so here we go. Let's say we want to throw away these two commits, and get rid of them. So
we are making this here our latest revision on the branch. I just copied the commit hash here
to the clipboard. And on the command line, I can get reset dash dash hard and use this commit hash.
Alright, let's have a look what happened. And we can see those newer commits disappeared.
And we're back at this rubbish in here. I'll give you a couple of seconds to realize that
this was a horrible mistake, panic emoji con. And there was invaluable data in those commits,
and we just deleted them by accident. So let's see if the ref log can help us in this situation.
Opening the ref log is as easy as typing get ref log on the command line.
And this here is the ref lock that journal where git logs all of the important actions. And first
of all the entries are ordered chronologically, which means the most recent, the newest items
are at the top. And if you look closely, you'll find this catastrophic reset action
right at the top. We just did that 20 seconds ago. So the journal seems to work. Good news.
Now if we want to undo our last action, we can simply restore the state before, which is also
documented here. We can just copy the commit hash, this is the state before. I'll copy that to the
command line to the clipboard. And I could use git reset once more totally valid, but I'm going to
create a new branch. Should I find a little bit more Elegant, happy ending. And I will have it
start at that previous revision with the correct state. So let's use that. Let's see what happened.
Okay, there's a new branch. Wow, that can that contains the seemingly lost commits.
We just saved our necks. Awesome. So we just restored some deleted commits with the ref lock.
And here's another great use case for the ref log, restoring branches.
So again, we think we can clean up and delete something. This time,
it's a branch not commits. But again, as life sometimes goes, we realize that it was a bad idea.
And we still need it. So let's take a look at this scenario in practice. That is,
ref log, re cover, Branch. Okay, so here's a beautiful, beautiful feature login branch. meds,
let's say our customer or boss or team lead, say they don't want it anymore, it's not necessary. So
of course, we go ahead and delete it. Just to make things worth worse, this commit here,
this one is present nowhere else. So we are definitely going to lose data when we deleted.
All right, but before we can delete it, we need to step away from that branch. It's
currently the head branch at the moment, and we can't delete the head branch and get so we're
checking our master. And then we can delete, we have to force deleted because it contains
a commit that is not merged into any other branch. And Wallah. Okay.
So now let's say our customer changed their mind. Again, the feature is necessary after also,
what do we do? What do we do? What do we do? Let's take another look at the ref log.
Alright, and it turns out, we're lucky the last entry was when we made that
checkout to master. So let's try returning to the state before again. And I will copy the
so here is the checkout and I'll copy this here to the clipboard and get put that on top. git branch
I think it was called featured login if I'm right, and we want to have it start at that revision here
that we just copied from the ref log. And let's see what happened. So okay, a branches back
Wallah. And it includes that seemingly last commit that valuable commit another happy ending.
If you're using Git in a desktop GUI like tower like you're seeing here, undoing a mistake is
really easy, you can simply press command Z to undo your last action, just like in a text editor,
when you made a typo, and this works for almost anything, accidentally deleting branches,
commits files, undoing a commit or a bad merge, you might have pushed something too early,
doesn't matter what it is. So I can just go ahead and delete this one more time, delete,
forced delete, I can just press Command Z. And again, there it is very helpful. Pretty often in
a project, you want to include libraries or other third party code. And you can go the manual way,
download the code, copy the files into your project, and commit the new files into your
projects. Git repository. And this is a valid report approach. But it's not the cleanest one.
If you simply throw those library files into your project, you're inviting a couple of problems.
First, you're mixing external code with your own unique project files.
But the library is actually a project of itself. And it should be kept separate from your own work.
There's no need to keep these files in the same version control context as your project.
And secondly, should the library change because bugs were fixed or new features added? You'll have
a hard time updating the library code. Again, we need to download the raw files and replace
the old items. These are quite common problems in everyday project. So Git has a solution and
that's sub modules. A sub module is just a standard git repository. The only specialty
is that it's nested inside another parent repository. sub module is a
fully functional and Git repository. You can modify files commit, pull, push from inside,
like with any other repository. Let's see how sub modules work in practice. Alright, so
we have a little sample project here. And let's say we want to add some third party code.
Creating a lib or or vendor folder is a good idea so that it's cleanly separated from our own files.
Let's do that. So let's create lib, and change into that folder. And I will add
a little JavaScript library from GitHub, I can do that with a Git submodule, add command, and then
provide the remote URL of that repository. And you can see that the command starts to clone the Git
repository responsive misspecified. And let's see what happened in our Working Copy folder.
And here we go. We have a lib folder, I just created that.
And here it is. Our project now contains that third party library inside the lib folder,
you can see there's a dot Git sub folder here.
So this is indeed a fully featured git repository. And let me emphasize this,
again, the actual contents of that sub module, they're not stored in our parent repository.
Right? This is important to understand apparent repo only stores the sub modules remote URL,
the local path inside the main project and the checkout revision.
Of course, the sub modules, working files are here in our project. Now, after all, we want to use the
libraries code, but the files aren't are not part of our parent projects. Git repository, they're
not part of that version control context. Okay, so let's take a closer look at what else happened.
So there's a new git modules file here. So let's take a look at that. Get modules.
And so you can see here is the path in our project and the remote URL documented, and as
also a record of that in the Git slash config file at the bottom sub module lib to progress again.
And finally, the Git also keeps a copy of each sub sub modules git repository
in its internal git modules folder. So here is the Git repository. There is
modules, and now we have lip to progress. So this is the the Git repository of our library,
stored inside of our main git repository. These are all internal files. So please don't mess with
this configuration. Because as you can see, get internal gets internal management of sub modules
is quite complex. There's good modules, there is dot git config, there is dot get modules.
My strong recommendation is don't mess with sub module configuration values and files manually.
Do yourself a favor and always use proper git commands or get desktop GUI to manage sub modules.
All right, so let's have a look at our projects status. And you can see that Git regards adding a
sub module as a modification like any other, so this means we have to commit it to our
main repository. Let me just do that quickly. So Git commit dash m, Add to Project
to progress library. Okay, we've successfully added a sub module to our main project. Congrats.
Now, let's start from the other end. Let's clone a project that already has sub modules added.
And let's step out of that and get clone I will clone the Apache Airflow project for that.
And let's see what happens here. So I know this project has several sub modules added
and we'll take a look at those in a second. Okay. All right.
Here we go the airflow project. So
let's see. So I know that the product checked has some sub modules in the dot GitHub
actions folder. So these are our sub modules for this project. But if we take a closer look
after cloning, visual empty. Okay, so what's happening here? Why, why are those sub module
folders empty? Well, you already know that a project report does not contain its sub
modules files, right? The parent repository only saves the sub module configurations.
So when we clone a project with a default git clone command, like I just did,
and we only download the project itself with the configuration, the sub module folders,
however, they stay empty. And we can repair that by now calling get sub module
update. And we have to initialize these for the first time. And we want to do this recursively.
Sorry, I have to step into the airflow project folder. And now
you can see this action happening here. It's several cloning processes start. And And
now, the sub module folders have been populated, or in other words, the
sub module Git repositories have been cloned can take another look at that and see, well,
yeah, these are all populated now. Right as files in here. Let me see.
So using git clone, like we just did, and then an extra command is a bit unnecessary,
I would say. So you can achieve the same if you use a particular option with Git clone,
the recurse submodules option. This tells Git to initialize all sub modules, when the cloning is
finished automatically. So I would have used the command like this instead, right, we left that
option here out the recurse submodules. And we would include that now, and everything works from
the beginning. Alright. I don't want to go into too much detail about some modules. But one more
thing is important to understand the way revisions are checked out in a sub module. A git repository
can have countless committed reversion revisions, but the files from one specific revision
can be in your working directory at one time, right. So in a normal git repository, you check
out a branch. And automatically the last commit in that branch is your checkout revision. If you add
new commits to that branch, the checkout revision is all always automatically the newest commit,
right, we just move the pointer forwards to the latest commit, like like you can see here.
sub module repositories, on the other hand, are always checked out on a specific commit,
not a branch. And it makes sense, think about it, the contents of a branch can change over time when
new commits arrive. In a sub module, however, you don't necessarily want that sub modules are
mostly library code. And in that situation, I want to guarantee that I always have a specific
revision of the code. Even if the maintainer of the library ships, some genius updates.
I don't know if those would break my code. So I always want a specific chosen version checked out.
Alright, let's quickly hop into the sub modules in this project. I can show you that. So
this is a target client. And when I select the sub module here, so here you can see that this
sub module is not checked out on a branch, but on a specific revision. And this is what I meant.
I've already mentioned it managing sub modules is a bit complicated, I can really recommend taking
a look at a good desktop, Gui, like tower, for example. So adding updating moving sub modules,
all of that is really simple here, take a look and see if it's helpful.
Okay, we could talk for hours about sub modules, but I think this
should be a good introduction. Just try them out in your project and take it from there.
And git repository is a perfect log of all your activities in a project,
every change is documented. And sometimes you want to browse through this log, because you're looking
for something you're wanting to find a piece of information. So let's talk a bit about how
searching and finding good works. Or in other words, how you can filter your commit history.
You can filter by almost anything by date by message by author by file by branch even. So
let's start with date and search for all commits that happened after a specific date, for example,
we're doing this in the Ruby on Rails, open source repository. So there are a couple of commits
present, you can use git log and then the after flag. So now I get all of the commits that are
after July 1, I specifically specified in that repository, I can also combine that with before,
and thereby get all of the commits that are between July 1 And July 5.
Pretty easy. And if you want to search for a certain commit message, you can also do that,
you can do that with the destination grep. Flag, and let's search for anything that contains
refactored in its message. And you will see here is one, here's one, and there's lots of others.
You can get really fancy with GREP, because it accepts regular expressions. So actually no limits
to your creativity. Looking for a certain author works exactly the same using the author flag. So
git log, let's search for anything from a certain Heinemeier colleague.
And of course, before I forget that, you can combine these criteria, of course, so for example,
you could use dash dash author and dash dash before in combination to find all commits
from a certain person before a certain date. And then you can also search for files, this can be
really handy to understand how a certain file evolved over time, for example, when you
know that a certain file used to work fine in the past, but it doesn't anymore. And you could
filter for commits with only that file. So let's do that git log double dash, I'll explain that
readme dot markdown, sorry, markdown. And I get all of the commits. Were readme dot markdown was
manipulated. The double dashes in that command, if you've taken a look, there just to make sure
that Git doesn't confuse the file name with a branch name, right. And finally, pretty helpful
way to see commits that are not in one branch, but in another one. So very handy. If you
want to want to find out, for example, what happened in the main branch, let's say,
after you branch off with your private feature branch. So let's type git log, feature.
Login, dash dash, or sorry, dot double dot notation, main. And this will show you all commits
that are in Maine, but not in feature login. And you might then decide to do a merge so that you're
up to date again, or you can at least see what happened in Maine while you were gone in your
future work. Alright, so much for today. Be sure to check out my little advanced git
kit. It's completely free of charge. It's a little collection of short videos about a lot of
advanced get topics from things like interactive rebase, all the way to branching strategies,
merge conflicts, sub modules, what have you. It's really helpful if you want to
become more productive with Git and version control. And again, it's free. Alright,
have fun and see you soon. Here on the Free Code Camp YouTube channel.
Advanced Git Tutorial - Interactive Rebase, Cherry-Picking, Reflog, Submodules and more
Takeaways
- 01
Interactive Rebase – Rewriting Local History
Interactive rebase lets you reorder, delete, reword, or squash commits in your local history. Use `reword` to change an older commit message and `squash` to combine multiple commits into one. Never rewrite history that has already been pushed to a shared repository.
- 02
Cherry-Picking – Selective Commit Transfer
Cherry-picking applies a specific commit from one branch onto another. It is designed for special cases like moving a commit made on the wrong branch, not as a daily alternative to merge or rebase.
- 03
Reflog – Git's Safety Net
The reflog records every HEAD movement, acting as Git's diary. It can restore seemingly lost commits after a hard reset by copying the commit hash from before the reset, and also recover deleted branches by returning to the state before deletion and creating a new branch.
- 04
Submodules – Embedding External Repositories
Git submodules let you include a separate repository as a nested folder. The parent repo only stores the submodule's URL, local path, and a pinned commit (not the actual contents). When cloning, submodule folders are empty; run `git submodule update --init --recursive` or clone with `--recurse-submodules` to populate them. Revision pinning ensures a fixed version of external code.
- 05
Searching & Comparing Commits
Use `git log` with flags like `--after`, `--before`, `--grep`, `--author`, and `--` to filter commits by date, message, author, or file. The double-dot notation (`..`) shows commits in one branch that are not in another, helping you compare branches.
- 06
Free Resource – Advanced Git Kit
The Advanced Git Kit is a free collection of short videos covering submodules, interactive rebase, cherry-picking, merge conflicts, and more to help you become more productive with Git.
Highlights
Interactive Rebase Overview
Cherry-pick is not a replacement
Reflog git's diary of HEAD movements
Submodules store only config in parent repo
Cloning submodules requires update --init